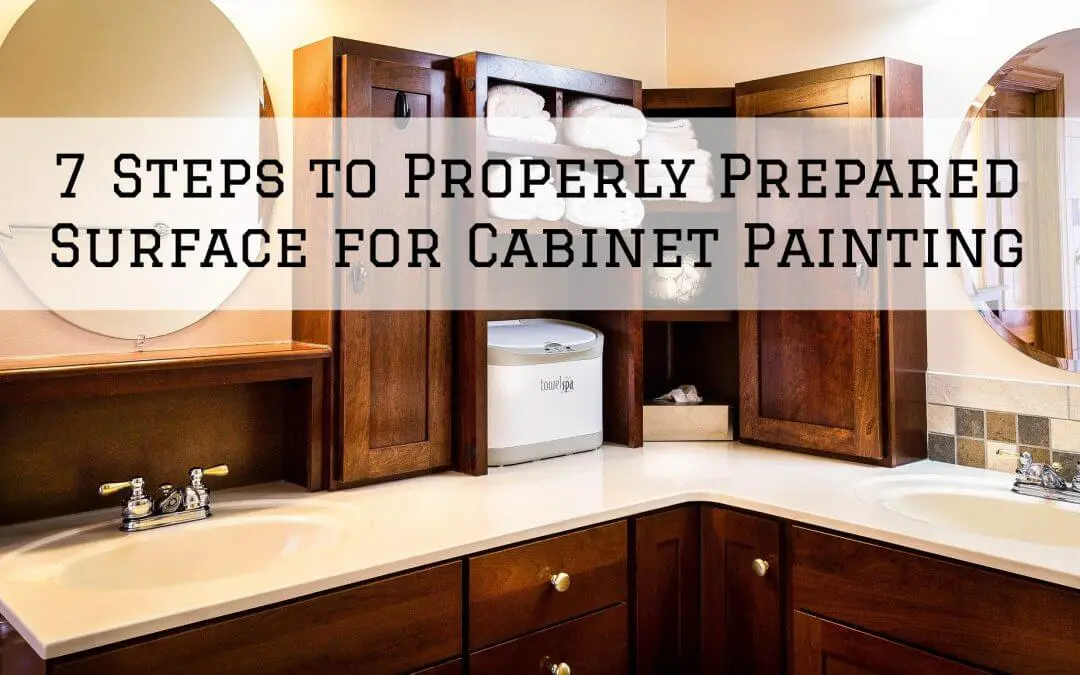
7 Steps to Properly Prepared Surface for Cabinet Painting in Denver Metro, CO.
When you’re looking to improve the look of your cabinets, you should be well aware that there are a number of steps that you’re going to have to take – and that’s even before you get to start applying the paint to the surface of the cabinets.
Indeed, if you want to have well-painted cabinets you have to make sure that you prepare the surface first, and with that in mind, we are going to show you the steps you will need to take to make it happen.
Let’s have a look at seven steps to properly prepared surfaces for cabinet painting in Denver Metro, CO.
1. Remove Hardware
The first thing that you’re going to need to do in order to get your surfaces properly prepared is to remove all of the hardware that is typically associated with cabinets.
Though of course, some would say you can just work your way around the hardware, it’s quite a lot easier to remove the hardware and then put it back – and you might even think of replacing the hardware with different-looking hardware while you’re at it!
2. Take Doors And Drawers Off Cabinets
The importance of removing the doors and drawers off of your cabinets cannot be understated as it helps you with surface preparation in a couple of ways.
One is that having these on will get in the way of painting – and so having them off helps you get the job done better.
Another is that it’s a lot easier to prepare to paint (and also easier to paint) these elements when they’re removed from the cabinets.
3. Degrease And Clean
A well-painted set of cabinets is one that has been cleaned first, and depending on what room you are in when you are making this happen there might be a bit of degreaser involved as well.
In any case, you want to make sure that you get all of the dirt and grime off of your cabinets as it will not do you any good to have it there – it will only make the final paintwork look unpleasant.
4. Check And Correct Surface Problems
One area that people will often neglect when they’re painting their cabinets in terms of preparation is checking to see if there are any surface issues that need to be corrected.
These can range from holes that need to be filled to cracks that need to be properly addressed — in any case, you need to make sure you look over the surface so that you don’t miss these.
5. Sand The Surface
The sanding of the surface of your cabinets is going to be the next important step, during which you will take your nice cabinets and get the surface that will be painted and get them to be more smooth.
Doing this will help get on the paint more easily and to some extent allow it to stay on better.
6. Clean Well
Once you have sanded the surface of your cabinets, you’re going to have to make sure that you properly clean it, because the sanding process is going to create quite a bit of sanding dust — and if you don’t remove it you will almost surely see it in the paint later on.
After you clean, be sure to allow time for the surfaces to fully dry and you will be on to the last step.
7. Apply Primer
The last step in preparing the surfaces of your cabinets is going to be applying a coat of primer and then allowing that primer to fully dry.
Doing this will get your cabinet surfaces as smooth as possible and also allow for the paint that you will then apply to your cabinets to adhere to the surfaces best.
Don’t settle for just any painter when you can get the attention to detail and professionalism from Imhoff Fine Residential Painting in Denver Metro, CO. Call us today to speak with one of our professional color consultants.
When Paint-and-Primer-in-One is Suitable and When It Should Be Avoided in Denver Metro, CO
When you spend a good amount of time in the world of home painting you may think about how sometimes lengthy the process of painting can be, and one of the things that contribute to this process is the use of a primer.
This is because the step of putting on that coat of primer can be quite time-consuming – both in terms of the fact that you have to apply the coat to the surface being painted as well as the fact that you then have to wait for the primer coat to dry.
As it turns out, there are some circumstances in which you can entirely avoid the primer coat if you invest in what is known as a paint-and-primer-in-one – but in some cases, you should not use this kind of two in one primer and paint and you have to go with the tried and true separate products in order to get a better paint job.
Here are some examples of when paint-and-primer-in-one is suitable and when it should be avoided in Denver Metro, CO
Avoid: When Painting The Exterior Of Your Home
One fairly clearcut area where you are going to want to make sure to use primer separate from your paint is when you are painting the exterior of your home.
Self-coating primer is significantly more expensive than buying paint and primer separately, but when you’re painting an interior room this may not make that big of a difference in the final cost of buying supplies for your painting project.
Exterior painting, however, requires many more gallons of paint and as such you could be looking at a cost that is several hundred dollars more if you go with paint-and-primer-in-one.
Suitable: When You Are Painting A Similar Interior Color
When you’re looking to paint the interior of your home and you have a room that is one color and the color you’re going to eventually change it to is basically the same (such as when you just are refreshing the paint job) or close enough in shade, you are going to be okay to use paint-and-primer-in-one.
This is because you will be able to make use of the product to cover what you have there (after you’ve made the time to properly clean and perhaps consider a gentle sanding to get the surface smoother of course) and since the color is going to be so similar, a paint-and-primer-in one is perfectly suitable for such use.
Avoid: When Painting Drywall And Masonry
When you’re thinking about painting surfaces such as drywall and masonry, this is exactly when you’re going to want to avoid making use of a paint-and-primer-in-one product and go directly for using primer and paint separately.
Drywall and masonry and other surfaces like them are quite porous, and when you will be painting porous surfaces, you shouldn’t use the all-in-one product but rather make use of primer so that the surface is properly sealed.
Suitable: When Painting A Darker Color
Lastly, remember that when the color you are going to be applying to your interior walls is going to be darker than the color or colors that are already on your walls, you’re going to be basically pretty much safe making use of a paint-and-primer-in-one.
The reason that this is the case is that in painting a darker color over a lighter color, you’re going to be basically taken care of as it were with the primer that had been previously applied to the surface of the walls, and you won’t have to worry about the old color coming through since lighter colors won’t show up through darker colors.
Don’t settle for just any painter when you can get the attention to detail and professionalism from Imhoff Fine Residential Painting in Denver Metro, CO. Call us today to speak with one of our professional color consultants.
Why It’s Not Always Best to Buy the Most Expensive Paint in Denver Metro, CO.
You may know that in considering all of the aspects of your future painting project, the cost of the paint itself is going to be one of the more expensive elements – and that’s even when you’re looking to purchase paint that is more moderately priced, as it were.
However, if you take the idea that buying paint that is cheaper necessarily means that it is lower in quality (and depending on how cheap you go on the paint, there’s a good reason that this is the case) this doesn’t mean that the other extreme is true – that it’s best to buy the most expensive paint.
Today we are going to go over some of the ideas that are often thought of in regards to the most expensive paint, and why it’s not the best idea to get it just because it happens to be the most expensive.
Let’s have a good look at the reasons why it’s not always best to buy the most expensive paint in Denver Metro, CO.
1. It’s Likely Barely Better Than Moderately Priced Paint
At the crux of the discussion that we are going to have here today is that when you’re looking at various kinds of paint and what they are going to do for you, the most expensive paint that you can buy is only going to be a small amount better than moderately priced paint, while being significantly more expensive.
There are a lot of qualities that you’re going to want to look for when you’re thinking about painting your home, among them being the very important one of knowing if you are going to be painting the exterior or interior of your paint.
From there you have to think about what room you are going to be painting – depending on what room you’re going to be painting, the kind of paint that you are going to be using is going to be just a little bit different — the paint that you use to paint in your bathroom is not going to be the same as the paint that you would use to paint in your dining room, for example.
2. You May Want To Repaint Sooner Than Not For Other Reasons
Though of course a lot of people are going to like the idea of spending time painting a room of their home or even the exterior of their home and doing everything they can to ensure that the paintwork lasts as long as possible, sometimes people just want to paint and then have plans to paint again only a few years later.
However, these plans mean that you are going to have a paint job that is only going to last a few years, and if that is the case then one of the biggest arguments in favor of using more expensive paint sort of falls apart as you are only going to be repainting sooner than not.
With the timeline for the next painting project only looming a few years away (such as if you know that you’re going to want to change up the color of the room) there’s no reason to use the most expensive paint available when a moderate price paint would do the work just as well.
3. Sometimes It’s Just Brand
Do you know how sometimes you go to a grocery store and see a box of cereal that’s a dollar cheaper but looks exactly the same as the one next to it with dancing bears on it?
That is sometimes the case with paint as well — having a nice name on the label can sometimes increase the price of the paint by a good amount.
So just because it has the name of a big paint manufacturer doesn’t mean that it’s of a higher quality than perhaps a paint that was locally made by a smaller company that isn’t so well known.
Don’t settle for just any painter when you can get the attention to detail and professionalism from Imhoff Fine Residential Painting in Denver Metro, CO. Call us today to speak with one of our professional color consultants.
Is Lead Paint In Your Home? Quick Test to Find Out In Denver Metro, CO
There are a number of circumstances in which you’re going to want to know about the possibility of lead paint being in your home, and in each of them, it is important that you make the time to find out if you have it or not as knowing will make the difference between whether you can move forward easily on a home improvement project or if you are going to have to call in experts to help you remove the paint first.
Such circumstances can be when you are looking to entirely renovate rooms and want to remove sections of walls, or even if you want to remove the existing paint on the walls of a room before you start to paint them anew — it is helpful to know if the paint on the walls contains any lead so that you are going to know what your next steps should be.
With all that being the case, let’s talk about if lead paint is in your home, and a quick test that you can take to find out in Denver Metro, CO.
What Is Lead Paint?
Before we delve into the tricky subject of how to determine if lead paint is in your home, we need to discuss first a bit of a history of lead paint and how it came to be that it became the villain of the painting world as it were.
For many years, most good quality paints had lead in it, and the reason for that was because of the qualities that it contributed to the paint – namely, that it helped to create certain colors that people wanted, and it also helped the paint have significantly longer durability than paint that didn’t have it at the time.
The problem then came when it was discovered that there was a correlation that could be made between being exposed to lead paint (especially if it was inhaled or ingested) and many health problems – and so in 1978 it was declared illegal to be used in home painting in the United States.
Is Your Home Newer Than 1978?
If your home was built after 1978, you can be almost entirely sure that there will be no traces of lead paint – however, there is always the slightest chance that somehow, someone managed to have a bucket of paint laying around that was not properly disposed of then and used it.
The best thing to do is to try to follow the same advice that we are going to offer you if it turns out that your home is older than 1978.
If Your Home Is Not Newer Than 1978
If you know that your home is not newer than 1978 there is a chance that you will find lead paint when you are doing remodeling.
The quick and basic test that you can do involves getting a small sample of the paint from the walls, putting it in a small sealed bag, and sending it to a laboratory where they will be able to properly determine whether or not there is lead to be found in the paint.
The best case scenario is going to be if it turns out that there is no lead in the paint – if that’s the case, you can proceed with the remodeling work exactly as you were.
If, however, it turns out that there is lead in the paint you are going to have to turn to professionals – there is no way that an individual can properly remove lead paint from a home without the use of certain equipment that would not usually be found with any given individual.
You will have to arrange for lead paint specialists to come to your home and properly remove the paint – and it’s possible that nobody will be allowed to be in the home for the duration of the paint removal process due to how toxic the paint is.
Don’t settle for just any painter when you can get the attention to detail and professionalism from Imhoff Fine Residential Painting in Denver Metro, CO. Call us today to speak with one of our professional color consultants.
Storage Room Painting Techniques in Denver Metro, CO.
You may know your storage room only when you think about how important it is to keep your things that don’t seem to have any place else in your home, or perhaps when there are things in your life that simply are to be used during certain times of the year and no other times (seasonal items, for example…) and given the nature of the room you might think that it doesn’t really matter how well it is or isn’t painting.
This is not necessarily the case, however, and you should be well aware of the fact that when you have a well-painted storage room it goes beyond just having a storage room that looks nice — given the steps that go into room painting, you will find that you actually will more often than not also substantially improve the walls when you paint.
With that being the case, let’s have a look at some storage room painting techniques in Denver Metro, CO.
1. Use Primer
One of the things that you’re going to need to do when you’re looking to paint your storage room is to make sure that you apply a coat of primer before you apply the first of possibly a couple of coats of paint.
This is fundamentally important for a couple of reasons, one of them being that a coat of primer will make the paint that follows it go on more smoothly.
The other reason that primer is good for your storage room painting project is that it helps the paint that you apply adhere to the surface better than if you do not make use of any primer, and you will see that the typical painting project that makes use of primer will last quite a bit longer than one that does not use a primer.
2. Choose A Good Color
You’re probably thinking that you don’t have to put too much thought into the color or colors that you’re going to apply to your storage room walls considering that it’s just going to be the storage room that is being painted.
You can really use just about any color you want, so long as it’s the kind of color that will look good on the walls of your storage room.
Indeed, this could be anything ranging from some of your favorite colors to just a color or colors that will look good with some of the other things that you have in your storage room.
3. Use A Good Brush And Roller
You’re going to want to make sure that when you are painting your storage room walls that you are using paintbrushes and rollers that are of at least average or better quality and certainly not lower-priced brushes and rollers.
As you are going to be spending a good amount of time painting your storage room walls, you should do so with good quality brushes and rollers for a couple of reasons – one of them being that you will actually find it significantly easier to apply paint and primer with better quality hardware.
Moreover, you will find that when you make use of low-quality brushes and rollers, there is actually a chance that the bristles and the roller covering will break off as they were while you are painting and you will end up looking at these same bits and pieces in the paint itself – certainly not a look you’ll want.
4. Paint Type Still Matters
Lastly, you’re going to want to make sure that you’re using the right kind of paint – at the very least you should be using interior paint and not exterior paint, certainly — for those are exclusively meant for use on the exterior of your home.
Don’t settle for just any painter when you can get the attention to detail and professionalism from Imhoff Fine Residential Painting in Denver Metro, CO. Call us today to speak with one of our professional color consultants.