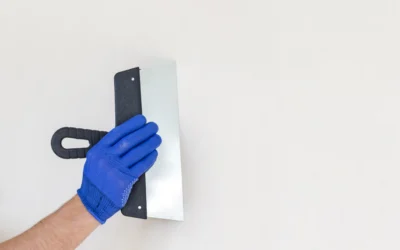
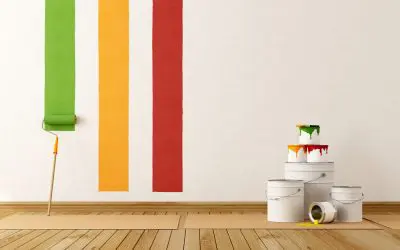
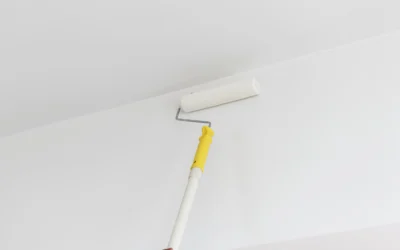
by Imhoff Painting | Jun 1, 2022 | Interior Painting
NURSERY ACCENT WALL PAINTING TIPS YOU NEED IN DENVER METRO, CO
For the most part, the notion of an accent wall is thought of in terms of rooms where adults will tend to spend a good amount of time – a dining room, a recreation room, that kind of thing.
However, you should know that an accent wall can look quite nice in a nursery, and if you make the time to learn about it, you can make a fantastic accent wall in your nursery.
LET’S HAVE A LOOK AT SOME TIPS FOR PAINTING AN ACCENT WALL IN A NURSERY IN DENVER METRO, CO
1. CLEANING BEFORE YOU START
One thing that you’re going to need to do when you’re painting an accent wall in a nursery is to make sure that you make the time to fully clean the area around where you will be painting as well as the surface of the wall being painted.
Doing this will help you to get a better painted accent wall, which makes sense if you think about how important it is to have a good surface upon which to paint.
Part of having a surface that’s ready to be painted is that said surface is smooth, and if you have a dirty surface you can bet it will be anything but smooth.
The best thing you can do is to make sure that you fully clean and then let the wall dry before you move on to the next step in the painting process.
2. CHOOSE YOUR COLOR OR COLORS WITH CARE
You likely know that one of the defining aspects of an accent wall is that you have this one wall that looks entirely different from all of the other walls in the room.
However, given that it’s a nursery in which you are painting, it’s entirely important that you are careful what color you are using to contrast with the other wall colors.
There are some good gentle colors from which you’ll be able to choose and it’s a good idea to make use of one that will be pleasant for your baby to have in their room, even though it could well be quite a while before they appreciate the nuance of the different colors in the room.
3. USE NO VOC PAINT
Since the target audience, so to speak, of your nursery is going to be a baby, it’s more important that you use paint that has no volatile organic compounds.
Though of course we could review the ins and outs of VOC paint in a separate article, suffice it to say that for the purpose of painting anything in a nursery you will want to avoid using paint with VOC’s.
There are many kinds of paint that make use of more natural ingredients and these will help you to have a well-painted accent wall.
4. PLAN BEFORE YOU PAINT
You should be well prepared before you start your painting project — knowing well in advance how much there will be painted in terms of square footage as well as having an idea of what color or colors you will want to use.
By planning the project in advance you’ll be able to get the right quantity of paint as well as a primer before you start painting (and having this in advance is certainly better than having too much paint and primer or even not enough of it, both of which have their own downsides as it were.
It’s also going to be quite advantageous for you to be able to know how long it’s going to go through each phase of the painting project as you will be able to make a schedule for when you will be away from the wall during times that you are allowing the wall to dry.
by Imhoff Painting | May 28, 2022 | Interior Painting
SIGNS YOUR INTERIOR PAINT WORK WASN’T DONE RIGHT IN DENVER METRO, CO
If you’ve hired a professional painting company, you may find yourself wondering once they have finished if they did a good job — and if so, how would you know that it was the case?
However, another question that may, unfortunately, come up after you have had a room painted is if you have a feeling that the work perhaps was not done quite right — what would be the signs if any, that paintwork was not correctly done?
LET’S LOOK AT SOME SIGNS THAT YOUR INTERIOR PAINTWORK WASN’T DONE RIGHT IN DENVER METRO, CO
1. BLISTERS, BLOTCHES, OR STREAKS ARE VISIBLE
One thing that will be a good telltale sign that the painting work that you got was not done up to the standards that a professional painting contractor should use is if you should happen to see blisters, blotches, or streaks on the surface of your walls when you’re reviewing.
The presence of these is a clear indication that the painters that worked on your walls either did not properly clean the wall before they applied primer or they didn’t allow the surfaces to fully dry before applying the primer.
By skipping these important steps, the painters saved some time but cost you a better looking paint job in that you really can’t get rid of these surface problems without making a lot of time to correct them — a lot more time than the painters saved by not cleaning or letting the surfaces dry!
2. THE PAINT ON THE WALL LOOKS WRINKLED
Another pretty clear sign that mistakes were made during the painting of your home interior will come in the form of seeing that the paint on the wall actually looks wrinkled — and you certainly didn’t ask the painters to make your walls have wrinkles, right?
There are a couple of things that could cause this unpleasant appearance to take place, chief among them being that the painters did not allow the first coat of paint to fully dry before applying the second coat.
In not letting the first coat to dry, the coat actually comes off of the surface just a bit while the second is being applied, the wrinkling effect that you see on the wall comes about — and this too takes a lot of work to correct.
3. VISIBLE STAINS
If you can see stains through the paint, that means pretty much one thing and that’s the fact that primer was not applied to the surface that was painted before the paint was applied.
Though of course, you would think that just having a couple of coats of paint on the wall would be enough to ensure that you won’t be seeing any stains, this is not the case — it’s essential that you first apply a coat of a good stain blocking primer to the surface before your first coat of paint is applied.
The only thing that could have stopped these kinds of stains from appearing is if the painter had properly applied primer to the surface that was painted prior to applying the first coat of paint.
4. AIR HOLES
Lastly, if you see air holes — tiny holes on the surface of the paint, that is — that generally means that instead of applying a second coat of paint after applying the first coat and then waiting for that coat of paint to dry, the painter just applied one coat of paint and left it at that.
The issue with only applying one coat of paint is that it can sometimes make these rather unpleasant air holes to appear on the surface of the wall after the paint has dried.
Avoiding air holes is just a matter of making sure that more than one coat of paint is applied to the walls.
by Imhoff Painting | May 20, 2022 | Interior Painting
LAUNDRY ROOM PAINTING MISTAKES TO AVOID IN DENVER METRO, CO.
You might not think of the laundry room as one of the rooms in your home that needs to be painted, and yet if you think about how a laundry room would look if it were entirely unpainted (or worse – painted and then allowed to look worse over time) and then you’ll realize based on that the importance of painting the room.
However, you may want to think about the way that you have to paint the room and more specifically the possible mistakes that can be made during the painting process — it can make the difference between a well-painted laundry room and one that is not so well painted.
LET’S HAVE A LOOK AT SOME LAUNDRY ROOM PAINTING MISTAKES TO AVOID IN DENVER METRO, CO.
1. BEING CONFINED TO ONLY ONE COLOR
If you’re going to be painting your laundry room, you might well think that you’re going to be limited in terms of what color or colors you’re going to be able to use, but this is not the case at all.
Even though it’s a laundry room, you’re well going to be able to make use of some of the most bright and fun colors that you want – you don’t have to use dull and gray colors because it happens to be a laundry room.
By making use of more fun colors, you’re going to be able to have a more entertaining laundry room, in a manner of speaking – it’s not like it’s going to turn into a party room all of a sudden!
2. NOT CLEANING BEFORE PAINTING
The funny thing about painting a laundry room is that in the process of painting the walls of the room, you might think that you aren’t going to need to clean the walls prior to painting them — how dirty could the walls of a laundry room be be, after all?
The truth is that even the walls of a laundry room have to be cleaned properly before you paint them, and that has to do with the fact that if you don’t properly clean a surface before painting it, you’re going to end up with a dirty surface – and that’s not a pleasant thing to see for the years that follow your paintwork.
What you should focus on doing when you’re getting ready to paint your laundry room is to make sure that you fully clean the surfaces being painted and then allow a good amount of time to pass so that the surfaces are going to be fully dry and ready for the next step in the painting process.
3. NOT SANDING AT ALL
When you look to paint your laundry room, it’s a good idea to think about how you can get the surfaces that are going to be painted to be as smooth as possible.
One of the best things that you can do to make sure that your surfaces are smooth is to first properly sand them – and this doesn’t necessarily mean rough sanding but a good gentle sanding so that the surfaces are smooth, and then removing the sanding dust that comes up during the sanding process.
Here too you should ensure that when you have finished removing the sanding dust you will have to keep the surface fully dry before you go on to the next step in the painting process — this is key in ensuring that you won’t have painting problems later on.
4. AVOIDING PRIMER
Lastly, remember that in just about every painting project whether on the exterior or interior of your home, you’re going to want to make sure that you use some primer.
This helps the paint to go on more smoothly and helps to keep the paint on longer.
by Imhoff Painting | May 17, 2022 | Interior Painting
TIPS FOR PREPARING TO PAINT YOUR LIVING ROOM IN DENVER METRO, CO
In looking to get your home to look its best, one thing that you should consider is how you are going to update the look of your living room – one of the more popular rooms in a house, particularly when you regularly have guests.
In any given painting project, you’re going to want to make sure that you properly prepare for the paintwork before you start the painting project.
LET’S HAVE A LOOK AT SOME TIPS FOR PREPARING TO PAINT YOUR LIVING ROOM IN DENVER METRO, CO
1. PROPERLY MEASURING SURFACES TO BE PAINTED
One thing that you’re going to need to do when you’re looking to paint your living room is to first make sure that you have fully measured the surface that is going to be painted.
The reason that this is so important is that you’re going to want to know how much paint and primer are going to be needed for your painting project – for when you know this, you will be able to plan out purchasing the right quantity of it and don’t accidentally buy too little or too much of it.
Moreover, you will need to get your surface to be painted measured well because that way you will be able to map out a timeline for the painting project itself – it’s good to know when you will be cleaning when you will be applying primer, and even such key things like when you will be allowing time for surfaces to dry.
2. GET THE RIGHT KIND OF PRIMER
You’re going to want to make sure that you properly use a good sort of primer when you are looking to paint your living room.
There are various kinds of primer that you’re going to be able to use in painting the interior of your home, but for painting your living room you’ll really only want to make sure to make use of a fairly basic primer that will protect the surface that is being painted but also ensure that the coats of paint will best stick to the walls.
3. CLEAN AFTER SANDING
Though you may well know that sanding is going to be an important part of the preparation process, some people will not realize that it’s just as important to clean after you have finished sanding.
More specifically, you’re going to have to spend a good amount of time removing all of the sanding dust that will have been brought about from the sanding process — and once you have removed all of this sanding dust you will likely find yourself with a damp surface, meaning that you are going to have to wait for the surface to fully dry before you move onto the next step in the painting process.
4. PROTECT SURFACES
Don’t forget that when you are looking to paint your living room, the paint that you’re going to be applying to the walls is also going to have an unfortunate tendency to drip as you are making use of it.
If you are trying to avoid having too much of a mess in your living room, the best thing that you’re going to be able to do is to put down some tarp or even a good quality drop cloth to prevent the paint from getting to the floor.
Of course, if you get too light of a protective cloth for the floor, you are going to have to be particularly careful in walking around the room as you are painting so that you do not move the drop cloth around and possibly allow the paint to get on the floor.
by dybvirtual | May 1, 2022 | Interior Painting
Pattern Painting Techniques for an Upscale Look in Denver Metro, CO.
Have you ever felt the need to refresh your space and give it a boost in style yet couldn’t quite figure out what to change — the color on your walls was satisfying, but perhaps adding something to it would be enough?
Wallpaper can be a lovely addition, but it requires skill, precision, and the knowledge that it will eventually have to come down — and taking down wallpaper is a pain few homeowners have the desire to experience.
Rather than spending the time and money on wallpaper as a means of giving your walls a little pizzazz, consider using paint and a bit of artistry to create a new, patterned design.
This can be easier than you think, so let’s talk about some pattern painting techniques for an upscale look in Denver Metro, CO.
It’s All Geometric
One of the most popular pattern techniques is the straight-lined geometric design.
Looking at the photo included with this post, you see a pattern that can be achieved by taping off sections of the wall and alternating paint shades to create the desired effect — but you can apply this at home with whatever shape you prefer.
These types of patterns are not required to be all sharp edges like chevrons or diamonds but can also show off a softer side with polka dots or curvy lines — in fact, a wavy design in blue shades can really make a coastal theme pop.
Geometric designs are pleasing to the eye, stimulating for our minds, and a great way to express our creativity without having to worry much about the technical aspects of the job — not to say this is foolproof, but it is a very user-friendly method and one that has endless pattern possibilities.
Feel the Texture
Similar to how people that appreciate art will discuss the particular brush strokes and paint choices in their favorite pieces, texture can be used on your walls to add the missing element you’re looking for.
By using sponges, brushes, or mix-ins, you can alternate the textures you use in your painting from wall to wall or even within the same wall to create a dynamic effect.
An interesting technique is the French strié which uses brush strokes to create the illusion of linen fabric — something that would look especially great with a tapestry or linen art print.
When opting for texturization, always be sure that whatever medium you are mixing with your paint is something that a particular brand/finish can combine with — check the website of the manufacturer to get information on your products to ensure the best results.
Stencil It In
Maybe there is a pattern that you don’t feel comfortable shaping by hand or you’d like the process to go by faster and that’s when a stencil comes in handy.
Stencils give you the flexibility to choose not only your pattern but also the size and placement — perhaps you just want a simple border or you’d like one accent wall entirely covered in your pattern.
You could combine the two in an open concept where a kitchen wall has the entire pattern while the connecting dining area simply showcases a matching border that ties the decor and theme together in an eye-catching way.
If you want to ensure your personality and uniqueness come across in your chosen style, cutting machines like Cricut are a great way to make it your own while still getting a precise cut on the design.
Regardless of your chosen method of adding a pattern to your walls, you can be sure that you are getting quite a bit of style bang for your buck.
Don’t settle for just any painter when you can get the attention to detail and professionalism from Imhoff Fine Residential Painting in Denver Metro, CO. Call us today to speak with one of our professional color consultants.
Related: Which Roller is Right for Your Paint Job in Denver Metro, CO.
5 Things To Consider Before Choosing A Wallpaper In Denver Metro, CO
7 Alternatives To Painting A Bedroom Ceiling White in Denver Metro, CO
by Imhoff Painting | Apr 25, 2022 | Interior Painting
DINING ROOM PAINTING TRICKS TO REMEMBER IN DENVER METRO, CO
In looking to make a better looking home overall, you are going to want to go through your home and see which of your rooms need the most improvement – and if it’s been a number of years since you last painted your dining room, there’s a good chance that it would be the perfect room to be painted.
However, you should be aware of the fact that if you take the time to learn a little about the process of painting your dining room, you can often end up with a better looking dining room.
LET’S HAVE A LOOK AT SOME DINING ROOM PAINTING TRICKS TO REMEMBER IN DENVER METRO, CO
1. USING THE RIGHT KIND OF PAINT
When you’re looking to paint your dining room, you are going to have to use the right sort of paint and that means more than just making use of interior paint rather than exterior paint, though of course, this is absolutely going to be a necessity.
Rather, you have to think about the fact that your dining room is going to see a fairly high amount of traffic, and that means that you are going to want to use a sort of paint that will be easier to clean than not.
In this, you will want to make use of a paint that is easy to clean – specifically, the glossy kind of paint over a flat paint that is quite difficult to clean.
2. USE FURNITURE TO DETERMINE COLOR
There are of course quite a few colors that you’re going to be able to make use of when you’re looking to paint the walls of your dining room, but not all of them are necessarily going to be quite right.
One way to choose a good dining room color is if you’re not going to be going with a color similar to the one or ones that you already have, think about the colors of the furniture you have in the room and think about what color or colors correspond with them.
Once you have done this, the really best way to make sure that it is going to really look right in the room is to get a sample of the actual paint and paint a little area on one of the walls and then have a look to see how it’s going to look on your walls in a variety of lighting conditions.
3. REMOVE FURNITURE
Speaking of furniture, you’re going to do a lot better for yourself when you’re looking to paint your dining room when you first remove as much of the furniture from the room as possible.
This is for two main purposes, being that you don’t want to get paint on this furniture, and the furniture being out of the room pretty much guarantees it won’t happen, and the fact that when you remove the furniture from the room you remove a sort of stumbling block – and the more space you have in which to operate, the fewer issues you will have during the painting process.
Of course, in many cases, some of the furniture is just going to be difficult to remove if not impossible, and so in those cases, you’re going to want to move those pieces of furniture as far away from the walls as possible and to cover them as best as possible with some sort of a tarp or drop cloth to protect them from paint.
4. DON’T RUSH
Lastly, remember that rushing through the painting process may seem like a way to get it done sooner, but all you’re going to end up doing is making mistakes that will take time to correct.
The better thing to do is to make sure that you take your time during the painting process so that these mistakes do not get made (as often.)
DON’T SETTLE FOR JUST ANY PAINTER WHEN YOU CAN GET THE ATTENTION TO DETAIL AND PROFESSIONALISM FROM IMHOFF FINE RESIDENTIAL PAINTING IN DENVER METRO, CO. CALL US TODAY TO SPEAK WITH ONE OF OUR PROFESSIONAL COLOR CONSULTANTS.
Related: Which Roller is Right for Your Paint Job in Denver Metro, CO.
5 Things To Consider Before Choosing A Wallpaper In Denver Metro, CO
7 Alternatives To Painting A Bedroom Ceiling White in Denver Metro, CO