7 Interesting Facts To Know About Painting Brick in Denver Metro, CO
When one is looking to paint the exterior of the house, there are quite a few things to take into consideration — and when your home exterior is brick, this is possibly even more so the case because of the nature of painting brick.
There are a number of things that you may want to know about the process of painting your brick exterior, as well as the very nature of brick itself as it pertains to being painted.
Let’s now look at and consider seven interesting facts to know about painting brick in Denver Metro, CO
1. You Cannot Unpaint Brick
One thing that you should know about painting brick is that it’s fundamentally a one-way thing — though you may be familiar with the ways that you would paint the exterior of a home, brick is unlike other surfaces that can get the paint easily removed before being repainted.
With that being the case, you should be sure that you are going to want to paint your brick exterior – if you later change your mind and want your original unpainted brick, you will face an uphill ugly road… more on this next.
2. It’s Possible To Remove Paint But Beware
Yes, it is possible to remove paint — but there are a few things that you should know, in addition to the fact that we did just say that it really isn’t possible (and to an extent, it really is not.)
You should know that paint is well absorbed into the brick, which is quite porous, and for this reason, even when you try to remove paint you will see that there are still traces of the paint leftover — and should you really do everything to scrub the remainder, you will cause serious damage to the brick itself and it will still not look anything like how it looked before it was painted.
3. Painting Brick Makes It More Weather Resistant
When you’re thinking about whether or not you want to paint your exterior brick, remember that by doing so you will be doing yourself a favor when it comes to the weather (pun certainly intended there!)
The nature of brick is to be quite a bit porous — this is just based on the material from which bricks are made, and so by painting the brick (and the paint itself is not porous… making it quite a bit water and snow resistant, more so than brick alone!)
4. Not All Brick Paint Is Breathable
Though it’s good that the paint that you apply to brick doesn’t let the water get in, it doesn’t let water out either.
While you may be wondering how this could possibly be relevant since water shouldn’t be able to get in either, right?
Well if there is a small rupture in the paint anywhere…the water could get in, even a little… and once it is in, it will be quite difficult to get out.
If you don’t get breathable paint, that is… and long-term exposure to water can cause quite a lot of damage to your brick.
5. Painted Brick Is Easier To Clean
In terms of cleaning brick surfaces, you’re not going to get much better than a painted brick exterior.
As much as the paint is not porous, you can imagine that it’s that much easier to clean and this is the case.
6. Brick Surfaces Must Be Prepared Prior To Painting
Though you might think that brick surfaces aren’t going to be necessary to prepare, they absolutely must be.
Indeed, they must be well cleaned and any cracks in the surface must be well taken care of.
7. Best Times To Paint Your Exterior Brick
Lastly, know this — the summer and the early fall are the best times to paint your exterior brick.
The weather and chances of rain are best, and you want these to be in your favor when you’re looking to paint.
Don’t settle for just any painter when you can get the attention to detail and professionalism from Imhoff Fine Residential Painting in Denver Metro, CO. Call us today to speak with one of our professional color consultants.
5 Tricks For Painting Wall Stripes in Denver Metro, CO
In the pursuit of a well designed room, you may think about the different ways that you can add color to your home, and one thing that you can do is to paint — not just in terms of painting an entire room but even by adding a design to the wall.
Specifically, you can think about adding stripes to the walls — they’re just the kind of thing to add something nice to a room and it does so with a lot less effort than if you were to have to paint the entire room.
Of course, adding stripes to a room is not as simple as one might think as there are nuances to the process that could possibly entirely throw off the painting project if one does not proceed with care.
With that being the case, let’s look at five tricks for painting wall stripes in Denver Metro, CO
1. Horizontal Or Vertical?
The first thing that you are going to have to decide when you’re looking to add stripes to your room is to think about if you’re going to want to have the stripes be horizontal or vertical.
Of course, there’s a big difference between having horizontal and vertical stripes — each has its own effect on the room, and each of them is going to fundamentally have a different appearance in the room.
Whether you’re going to want to make use of one or the other is essentially up to you, and it might be useful to make use of simple imaging tools to try to see what the room is going to look like once you add those particular stripes.
2. Color Or Colors Of Stripes
Another important factor in adding stripes to the room being painted is the color or the colors of the stripes that you’re looking to paint.
This is of course important because you need to think about if you want there to be more than one color, and then what colors those will be.
3. Equal Thickness Of Stripes?
Since you will possibly be making use of more than one stripe in the painting process, you are going to have to decide if you want these stripes to be of equal thickness or if you want them to be different.
One way that you could do it is to have one stripe that is particularly thick and then a couple that is relatively thin by comparison.
Another possibility is to just have one stripe and no other — and you can then decide how thick you want that one stripe to be.
4. Painter’s Tape To Keep Them Neat
There are many ways that you can keep your stripe or stripes looking as neat as possible and one of them is to make use of painter’s tape.
It’s part of the process — you’re going to have to make use of a simple pencil, preferably one that is going to be the same color that you’re going to be eventually using — and take a ruler to make straight lines on the wall.
You will then be able to take the painter’s tape and use it in order to make sure that the stripes look as good as possible.
5. Cut In The Sides
Lastly, though you are eventually going to be making use of paint rollers to fill in the majority of the stripes that you’re going to be painting on the walls, you should start by cutting in using a good paintbrush.
The reason that this is a good idea is that by cutting in, you get the stripes started and looking ideal.
Don’t settle for just any painter when you can get the attention to detail and professionalism from Imhoff Fine Residential Painting in Denver Metro, CO. Call us today to speak with one of our professional color consultants.
5 Surprising Challenges Of Removing Wallpaper in Denver Metro, CO
In the course of updating the look of your home, you may come across a wallpaper that stands in the way of painting an interior room.
Sometimes it’s a good idea to paint over wallpaper, as it may be too difficult to remove, but when you are looking at wallpaper that is better to remove, you may find that there are some challenges with the removal process that you might not have anticipated.
Let’s look at and consider five surprising challenges of removing wallpaper in Denver Metro, CO.
1. Thinking You Need To Do The Whole Room At Once
The first challenge of removing wallpaper from a room comes in the form of thinking that you have to take on all of the wallpaper of the room at once.
What happens when you do this is that you will spray all of the wallpaper of the room, perhaps thinking that you are going to do each step for the entire room, and then by the time you circle back around to start removing the wallpaper from the first part of the wall you find that the wallpaper has dried and is back to being difficult to remove.
A better alternative to doing this is to take on one section at a time — spraying a section of wallpaper, allowing time for that section to properly get soaked, and then removing the wallpaper from that particular section.
2. Not Having Protective Material In Place
As you may know, the removal of wallpaper can be a bit messy — but the extent of the mess can be such that you will likely need to get additional protective material for the room in which you are working.
One thing that you can do in order to take on the challenge of having this kind of mess is similar to what you might do when you are looking to paint your interior room — making use of a drop cloth to protect the floor from the various things that come into play in the wallpaper removal process.
3. Trash Bags For The Waste
Speaking of messes from the wallpaper removal process, are you aware that the volume of trash that is generated from removing wallpaper is such that you are going to need to have large trash bags on hand in which to store said wallpaper.
The mistake that people will make is that they will either hold off on getting any trash bags until the project is well underway, which is bad because by then you may have piles of soggy wallpaper just sitting on the floor making a mess.
It’s far better to have the trash bags already on hand so that you’ll be prepared to tackle the waste you will make from the wallpaper removing process.
4. Adhesive That Remains
In removing the wallpaper from your walls, you may well think that you are pretty much done with everything that you need to do in the wallpaper removing process, however, this is not always the case.
Indeed, you possibly are going to find yourself with an adhesive that has remained on the surface — and you’re going to need to remove that adhesive before you move on with the next steps that you have.
It’s a good idea to make use of a solution combining water and trisodium phosphate to properly clean this adhesive off of the wall.
5. Using The Right Tools
Lastly, you are going to need to make sure that you have the right tools on hand for removing the wallpaper — the right kind of scraping tools if you have to get under the wallpaper.
The key thing is that you are going to need to make sure that the tools you bring to the wallpaper removal are actually necessary.
Don’t settle for just any painter when you can get the attention to detail and professionalism from Imhoff Fine Residential Painting in Denver Metro, CO. Call us today to speak with one of our professional color consultants.
5 Ways To Know An Interior Paint Job Was Not Well Done in Denver Metro, CO
When you’ve got to take the time to get your home improved and one of the things that you choose to get done is the painting of one of your rooms, it’s entirely possible that you will hire a professional painting contractor.
Alternatively, you may be moving into a home or apartment and have been told that one of the selling points of the new place is that you won’t have to get it painted since it was already recently painted.
As nice as that is in theory, you are going to likely want to inspect it yourself to see if it really is what they are purporting it to be — a well-painted interior paint job.
The problem is that there are some things that will be there and if you are not specifically looking for them, avoid your gaze — things that will speak to the interior paint job having been done not as well as it could have been.
Let’s look at five ways to know an interior paint job was not well done in Denver Metro, CO
1. The Paint Does Not Cover The Surfaces Well
One way that you’re going to be able to tell that an interior paint job was not done well is if you can see that the paint just doesn’t cover the surfaces well at all, and it is quite obvious.
There are.a number of reasons that this might have occurred, one being that the paint job was rushed and the paint was applied to the interior walls with so much haste that the work of applying the paint was just done poorly.
2. Paint That Appears To Be Cracked
If you look at the surface of the painted walls and you see that there are cracks in the paint, you will know for sure that the paint job was not at all done correctly.
Having these cracks in the wall means that there was some kind of failure on the part of the painters in terms of preparation — maybe they painted with the wrong kind of paint over a particular primer, or maybe they didn’t even use any primer at all.
3. Drips And Splatters
If you look at the floor or any other part of the room and you see any number of paint drippings or splatters, you’re going to know that the people that painted the room didn’t take the time to protect the room from such drips.
If you see these, not only will you know that the paintwork was done at least a bit poorly but you’ll have a big cleanup job to do should you choose to pursue the place.
4. Paint On The Ceiling
Of course if you look up at the ceiling and you see paint that does not belong there, you’re going to know that the paintwork was not done correctly.
The paint that goes into an interior paint job should only go on the walls of the room, and the way that you know that a painter knows what they are doing is that they take the time to protect the ceiling from being painted in one of a few ways.
They can put up painter’s tape in a certain way so the paint does not transfer over, or they can use an angled paintbrush, but in any case they don’t get paint on the ceiling.
5. Paint Strokes You Can See
Lastly, if you can see the paint strokes that the person or people used when they painted the interior walls, you’ll know that either they painted too quickly and didn’t make sure that they were smooth and even in painting, or they just didn’t apply primer prior to applying a coat of paint.
Don’t settle for just any painter when you can get the attention to detail and professionalism from Imhoff Fine Residential Painting in Denver Metro, CO. Call us today to speak with one of our professional color consultants.
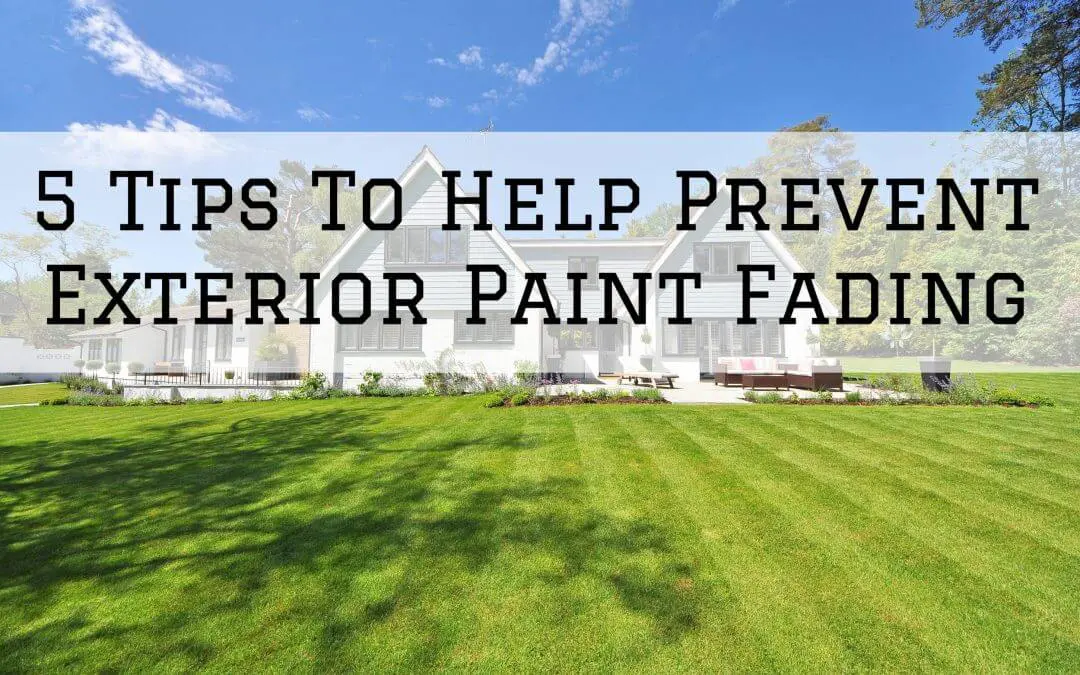
5 Tips To Help Prevent Exterior Paint Fading in Denver Metro, CO
When you think about the process of painting the exterior of your home, you surely have a lot of thought that goes into what kind of paint you are going to use, the color you will prefer, and other such things.
It’s entirely possible that you won’t put a lot of thought into the long-term durability of your exterior paint — in particular, the color of the paint and how it will look after a few years.
However, if you take the time to familiarize yourself with some key techniques, you will be able to prevent some of the fading associated with exterior paint.
With that being the case, let’s now look at five tips to help prevent exterior paint fading in Denver Metro, CO
1. Neutral Colors To Resist Better
One thing that you may wish to consider when you’re looking to paint your home exterior if you want to ensure that the fading is held off as long as possible is to choose colors that are more neutral.
The reason that this is the case is that when you choose colors such a blue, red, and yellow (just to name a few) you are looking to get a paint job that is likely to be a bit faded over time.
By choosing the more neutral colors, your exterior paintwork will stand up a bit longer.
2. Better Quality Paint Lasts Longer
Another significant factor that plays into having exterior paint that fades less quickly is the quality of the paint that you purchase.
It should come as no surprise that if you pay a substantially small amount for your paint and you aren’t getting it on sale or in some kind of deal, that you might be getting paint that is of poor quality.
Even though upfront you are paying less for your paint, in the long term you are going to be paying more because you will have to paint again sooner, unless of course, you don’t mind the fact that your paint appears to be faded or possibly even peeling in parts.
The best thing you could do is to get a better quality paint and to avoid this issue entirely — or at least extend the length of how long it is until your paint is fading.
3. Additional Coats
One of the more simple ways that you can possibly prevent the color of your exterior from fading as quickly is to paint additional coats.
One should in any case paint a second coat of paint after the first coat of paint out of the need for a second coat of paint (in that one coat of paint is generally not enough when painting your home) but it’s entirely possible that an additional coat could help with preventing the color from fading as quickly over time.
4. Consider A Reflective Sheen
There are many different sheens that you can get for the exterior of your home, paint wise, but one of the better choices that you can make if you’re looking to reduce the fading is one that is reflective.
A reflective sheen for your exterior paint is going to be good because it will be more protective against the sun, one of the big things that cause the fading to happen in the first place.
5. Use The Appropriate Paint For Your Home Material
Lastly, you need to make sure that you are using the right kind of paint for the type of home material that makes up the exterior of your home.
It bears investigation when you are painting the exterior of your home to see what paint would be best for you — and to make sure that you use precisely that paint.
Don’t settle for just any painter when you can get the attention to detail and professionalism from Imhoff Fine Residential Painting in Denver Metro, CO. Call us today to speak with one of our professional color consultants.