Can I change the color of my trim & cabinets? Toning, shading, wood makeover, colored lacquer, re-staining; whatever it’s called, it’s a great way to get where you want to go in your renovation without spending lots of coin to get there. Here in Denver, homes have a lot of architectural millwork, and in the homes we work, much of it dates back to the frontier days. Because Denver is semi-arid, this wood is often in excellent condition despite its age. Wood finish colors however, are trendy and change like paint colors, sometimes even loop back like classics, and so refinishing wood is preferred to replacing it – especially given the quality of the old-growth wood, milled and finished by craftsmen – it is well worth the effort to restore it.
Adjusting the color of architectural millwork is pretty simple once you understand the basics. The process is simple: in a nutshell what you’re doing is cleaning the surface of the existing finish, then lightly sanding it, then cleaning it again, and finally applying very thin, uniform coats of lightly tinted clear finish base. Viola! New looking cabinets, doors, windows, trim and pieces of furniture! And BONUS: you’re practicing sustainable renovation too! A tree gave life and was transformed into something beautiful and lasting – you chose to restore it and in so doing you honor and sustain that life cycle. Good on you!
Details – how it’s done in steps:
First: cleaning. If you want to change the color of new or lightly used millwork, often just a simple cleaning will be sufficient, something like denatured alcohol will work . A note of caution- cleaning with solvents may soften or even melt existing finish, so test in an obscure location and not the most-used cabinet next to the refrigerator! For cabinets or trim that has been in use for some time, use xylene to clean, it’s smelly and you’ll need to wear safety equipment (solvent gloves, eye protection, and a good respirator with vapor cartridges, or the cheap but effective 3M model N95) but xylene is effective at removing oils, residue from cleaners and most other foreign matter on the finish. For really soiled surfaces, begin with a cleanser such as tsp substitute, then after overnight dry, use xylene or another appropriate solvent.
Next you’ll want to scuff the finish. This step is necessary to provide a “profile”, or “tooth” to the surface – it may help to think of the goal of this step in more common circumstances; for example, imaging dripping paint on the windshield of your car vs. dripping the same paint on your driveway – which will be easier to remove? The glass, of course, you could probably do it with your thumbnail, whereas the driveway may never come completely clean – no matter how much elbow grease and implement you employ. Anyway, scuff the finish so the new material has something to bond to. But be careful here – you do not want to rub through the stain layer under the finish, just scuff the finish. If you do rub through the stain you will need to touch up any such areas to bring them back to the base color of the adjacent areas. At this stage you will also want to check the putty and fill areas for soundness, remove and replace any deteriorated or missing fill with wood putty that is sand-able, stain-able and of high quality without suspended solvents that can release and “halo” around nail holes after you apply finish coats.
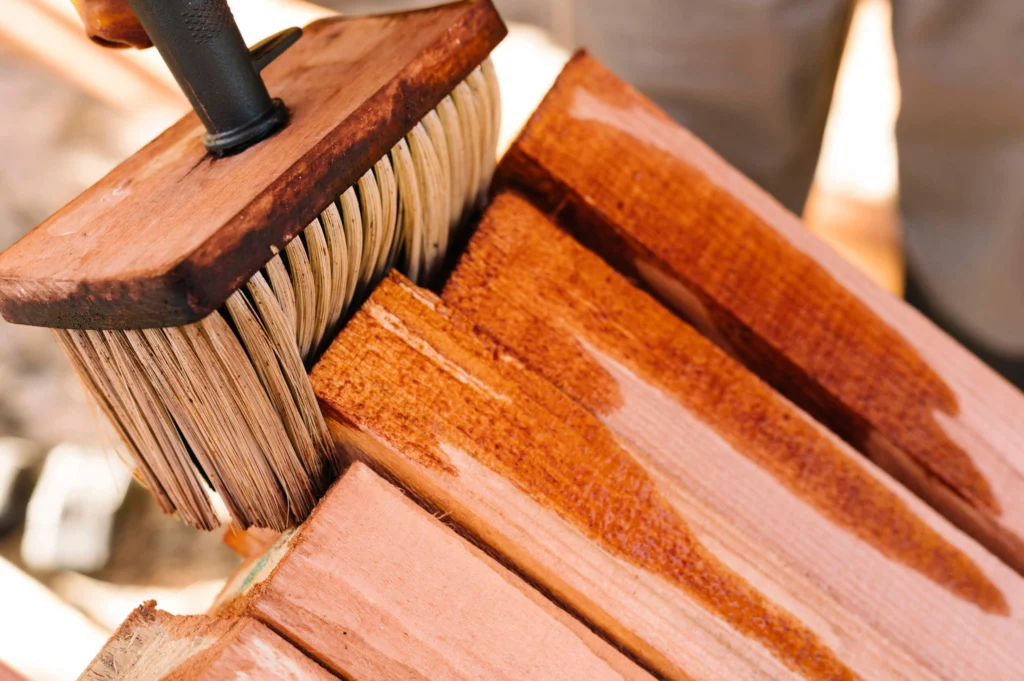
After scuffing, clean again with a clean cloth moistened with thinner, xylene or use tack cloth- available at your local paint store. Once cleaned, scuffed, and wiped clean again, you’re ready to start toning. A note on toning products: a good pedestrian (beginner) product is Minwax Polyshades: this product comes in both water-based and solvent-based (both polyurethanes) colors, and is easy to use – especially on standing & running trim like baseboards, chair rail, picture rail, crown, trim & casing. It’s a little more difficult to use on broad surfaces like doors and cabinetry for the simple reason of uniform coats – easy to achieve by brush on 4 ¼ inch trim, but you’ll probably want to spray broad surfaces to achieve a uniform color & sheen. Test your desired color choice in an obscure location or on a piece of scrap – remember the test area must first be the same color and finish as the areas you intend to treat.
With practice, great results can be achieved, but remember – it’s sometimes better to get there in steps, not a single application but several light coats in succession – thin to win – as the old timers say.
Toning products on a more professional level are urethanes, lacquers and conversion varnish finishes. You won’t find these products in your big box home improvement warehouse; and if you do, you certainly will not find anyone who can advise you on mixing ratios and limits, catalyzing, etc. Find a real, old-school paint store, go in there and look for gray hair in an apron- that’s your man. Depending on what you use, you will add colors with different materials. These products are best sprayed, and have a somewhat steeper learning curve. Not recommended for beginners or even intermediate skilled applicators – these finishes dry fast, hard and resist removal (should you make an application error, or a color mixing error), but are as easy as cleaning pudding if you catalyze incorrectly (move along, no fun here either).
With spraying comes additional site preparation: covering floors, walls, ceilings, pets, spouse and offspring – and anything else you do not want to tone, with plastic, rosin paper, masking film, etc. And, you’ll need a plan for vapor management: moving overspray and vapors from the room. Fans work, but remember to allow fresh supply and sufficient output for the most effective and fastest results. On a professional level air-movers are used, these machines come in various sizes and cfm capacities – but essentially they suck in air and push it out a flexible duct that is routed outside and open door or window – and they are safe to use in suspended solvent-vapor environments. You’ll still need to supply makeup air with these.
Finally, and most importantly, you must cover return air vents so the vapors and overspray do not enter your HVAC system and ignite to blow up your house. Shutting the system off is smart too. Safety measures for handling solvents and rags are also important – they will combust, and you’ll have a really bad day or a lousy night’s sleep if that happens.
Carry on then – some things cannot be undone; like ringing a bell, restoring architectural millwork has risks, foremost among them is that you cannot go back to the way it was. Be certain, be inquisitive, and be informed. Hire a professional if there’s much at stake. And practice. On anything about the house you can practice: old stereo cabinet, chairs or kitschy plaques from the thrift store, scrap lumber, the dash board of your ’84 Fleetwood Brougham D’Elegant, but check with your spouse first though, make certain the item which is of little value to you is of similar worth to him or her.
FAQ
Is it better to refinish or replace old wood cabinets and trim?
Refinishing is almost always the better choice—it saves money and preserves old wood. A good toning or re-staining job will make your cabinets look fresh without the waste or expense of replacing them.
Do I need to sand my cabinets before re-staining or toning them?
Yes, but only a light scuffing—just enough to give the new finish something to grip. You’re not stripping it down, just creating texture so the new color bonds correctly.
What happens if I sand through the stain layer?
You’ll end up with uneven color, so you’ll need to touch up the sanded areas with stain before continuing. Next time, go easy—thin to win!
A space’s paint finish has to do with how much sheen the paint on your wall has when it dries. The types of paint finishes range from being flat or matte to high-gloss. In between we have eggshell, satin and semi-gloss. These options can get a little overwhelming, so here are some things to consider while choosing a type of paint finish for your space.
Durability
The more sheen a paint finish gives you, the more expensive it can be. Sometimes, investing the extra bucks can also mean the paint is of better quality. Putting on a high-gloss coat ensures that you don’t have to worry about paint chipping off in just a year or two. If you feel that it’s too expensive, you can lower the sheen and choose an eggshell or satin finish. This finish won’t provide as much protection, but will fall into a more an affordable price range.
Paint color
It’s a common notion to believe high-gloss is always the best choice. However, just because the wall looks ultra shiny does not mean the sheen is well suited for the color. In fact, darker shades of paint already have a lot of gloss in them, which boosts the sheen. When high-gloss is further applied it might end up highlighting the flaws of the wall, if the surface is not well prepared beforehand.
Movement in the room
Lower sheen can equate to dirty walls, so keep in mind the purpose of the room being painted. In the kitchen we often use a variation of high-gloss to ensure that grease generated while cooking does not stick to the walls, and can be easily cleaned off. Similarly, you can balance out that ultra shine with a flat finish on upper walls and ceilings and low-traffic rooms because less traffic means less dirt accumulation.
Requirements
Before you choose the finish of your wall, consider why you are choosing sheen instead of just regular paint. Sheen can work as a cover up for rough walls. On the other hand, matte can create a sculptural finish on the wall. Choosing a different finish for just one wall in the room can also add to the character of a room without too much effort. Not only that, changing the sheen can also alter the undertone of the color you paint on your walls.
Play with light
Sheen is a great light reflector. Use it to your advantage to brighten up a dark or small space. On the contrary, you can also use matte finish on the walls of a larger space to give off a cozy feel to your otherwise airy space. Given that the paint finish can impact the overall feel of your space, consider all your options.
The finish of your walls can be altered and customized to benefit your needs. It can also be used to enhance or diminish the effect of light, space and color psychology. Plan and paint your walls with a finish that you will enjoy and embrace!
If you are thinking of painting your house’s exterior, the first thing you should keep in mind is maintaining an aesthetically pleasing color scheme. Painting all parts of your exterior (rims, doors, walls etc.) the same color would look boring and unappealing, but you want to make sure that the different colors you choose match each other.
To make your life easier here are some of the most popular house exterior color choices categorized based on the vibe you want your house to give off:
Classic
If you want your house to have a classic feel, then bold colors might not be the way to go. These days, the most popular exterior paint colors for this category are White Putty, Taupe and Olive Green. The exterior colors follow a neutral paint scheme and are not very eye-catching. It makes the house a perfect match for a colorful landscape, or a decorated patio.
Sea Green as your siding color with white accents can also give your home a classic exterior.
Modern Chic
One thing you’ll see in many modern homes is a bold hue in their exterior. This bold hue may not be present in all parts of the exterior portion of the home, but even when it is just present in the trim or in the accent – it makes a statement.
A blue-gray color palette with a white trim is “in” with modern homes. Slate Gray + White + Deep Turquoise and Cream + Deep Blue + Beige are two color combinations that can give your home an elegant, sophisticated look.
“In” with Nature
Paint colors popular in this category too have neutral shades closely revolving around Green and Blue. You might want to look into purchasing Restless Sea, Twinkling Lights, and Nature’s Gift by Behr.
Beach-y
This type of exterior calls for bright, and warm colors. The main colors in trend are Cheerful Yellow, Cinnamon and Pure White. You can couple these colors with white accents which will give a very crisp and clean look.
But, if you aren’t really sure about the kind of vibe to give off and are really just looking for trendy exterior colors, below is a list with a few color options that might help you out.
For Siding:
Neutral Beige
Gray-Blues
Brick Brown
For Trim:
White, Creams
Light Grays
For Accents:
Blues
Brown
Purple
Maybe you’re not in the mood to play it safe. Maybe you’re looking for an exterior transformation for your home. Maybe you’re just overwhelmed by all the options and choices. If you’re overwhelmed by all this or if you’re just in the mood for some professional direction, then you can always book a color consultation!
Are you thinking of painting your walls and are unsure whether you should do it yourself or hire a paint contractor? If you’re into DIYs, then painting your walls yourself is definitely a thought that has crossed your mind. But if you’re not one of those people, then painting your walls yourself is definitely something you consider a hassle. Either way, painting an entire room or an entire house may prove to be more work than you might actually think. To make your decision a little easier, here are some of the pros and cons of painting your walls yourself:
PROS
Control:
A DIY on your walls means you have full control over everything: which shade you want to paint your walls, how you want to paint them and what you want to do with your walls. Some paint contractors may not get the way you envisioned your walls to be colored (though this is unlikely with the right contractor). So, a DIY job will save you the hassle of explaining yourself to someone and will let you take charge.
Cost:
It is cheaper if you choose to paint your walls yourself. You can save a bit of money as the only things you would need to buy are paint supplies and paint. You won’t need to pay for the labor cost. If your family and friends are looking to take on a DIY project then you could ask them to lend a hand at a “Painting Party,” which could be quite fun. This will save you time and you won’t have to pay for the labor. Just provide pizza and beer!
CONS
Quality:
Quality is one of the few things you might have to compromise if you choose not to hire a professional. Your walls might not have the same polished and professional look and might end up with uneven coats of paints and mismatched spots. Professionals are called professionals for a reason.
Time:
Another downside of painting your walls yourself is that the work might not finish in the time that you allotted. The initial plan of finishing the work during a weekend can extend up to a couple of weekends. Plus, the paint finish might not be as you intended it to be. There are multiple things that can hold you back such as unplanned work commitments and family responsibilities and something you didn’t expect! Hiring a painting contractor will ensure your work is finished in an allotted time, something which will most likely get altered if you take on the task.
Skill:
Professionals can undoubtedly do a better job of painting spaces which required a bit of skill such as places with strange lighting or spaces that require a lot of preparation. It is better and more practical to hire a contractor and have their team get the job done well, than to realize that it’s just out of your depth, and hire a contractor after wasting time, energy and resources.
So are you still in a conundrum or have you made up your mind?
When it comes to selecting colors for our home décor, we stick to what we see in social media or to colors we are hardwired to like. Color consultations keep in mind your tastes and trends to come up with what appeals to a larger audience. Here are 6 reason why you should book a color consultant before selecting colors for your painting project.
Color Psychology
Any color used in décor can have a very strong impact on people. A color consultant is perhaps the best person who can accurately name shades that work best for you and your family. They can link the needs of our mind with a color to balance and add to a soothing comfortable décor. You might be able to state orange used in walls has a positive effect on a child’s brain but a color consultant will be able to tell you what specific shade of orange works best for your child’s room in accordance with lighting and space.
Knowledge
We may know stuff we read here and there, but color consultants are trained experts. If you are sick, you pay a visit to a certified doctor. Similarly, if you are feeling confused between colors, pay a visit to a color consultant. You may be a big fan of blue, but only a consultant can specify and explain the extensive number of undertones blue has.
They put your need first
Color consultants are hired to cater to your needs. You may think that you already know what you want and need, so why get a consultant? A consultant will actively participant in the discussion and refine your thoughts and wants to create a harmonizing color palette.
Expertise
A consultant will most likely have handled many more clients like you and they’ve experienced all the pitfalls that can arise when furnishing a space. In fact, once you brief them about your needs, an experienced consultant will be able to tell which shop to go to and what exact item you should get while having already calculated how the color will reflect with the space and shape of the area.
Cost efficient
If you’ve ever painted a room, you know that the color you chose on that little color swatch, rarely looks like the final result on your walls. The lighting and decor of the room has a major effect on how the color will look once it’s been painted on and dried. Color consultants have the experience to foresee this and will have a much better idea of what the final color will look like when all is said and done. This dramatically reduces the chance of you having to paint again once you have finished.
Whether you are planning to repaint one room or your entire house, a color consultant is the person who will clear your doubts and lead you through the most colorful path.